
I have
seen lovely paper rosettes in several parties recently and knew that I wanted
to incorporate them into one of my dessert tables. Using supplies that I already had at home, I
was able to create a fun and budget-friendly Halloween banner made from these paper
rosettes. Here’s how:
Supplies:
- (14)
sheets white 8 ½ x 11 office paper (you can use scrapbook paper to add more color,
but scrapbook paper can be expensive and I already had boxes of white office
paper on hand)
- Glue
Gun
- (7) Patterned
Cupcake Liners - I used (3) black/white polkadot liners and (4) black/white
damask liners
- (7) 2½-Inch
Paper Circles - I used (3) orange circles and (4) black circles and my Martha
Stewart Circle Cutter to cut circles out of scrapbook paper
- (7) 2-Inch
Paper Circles - I used my 2-Inch Craft Punch to punch out the party tags from my
new Halloween Party Printable Collection
- Hole
Puncher
- Ribbon
Instructions:
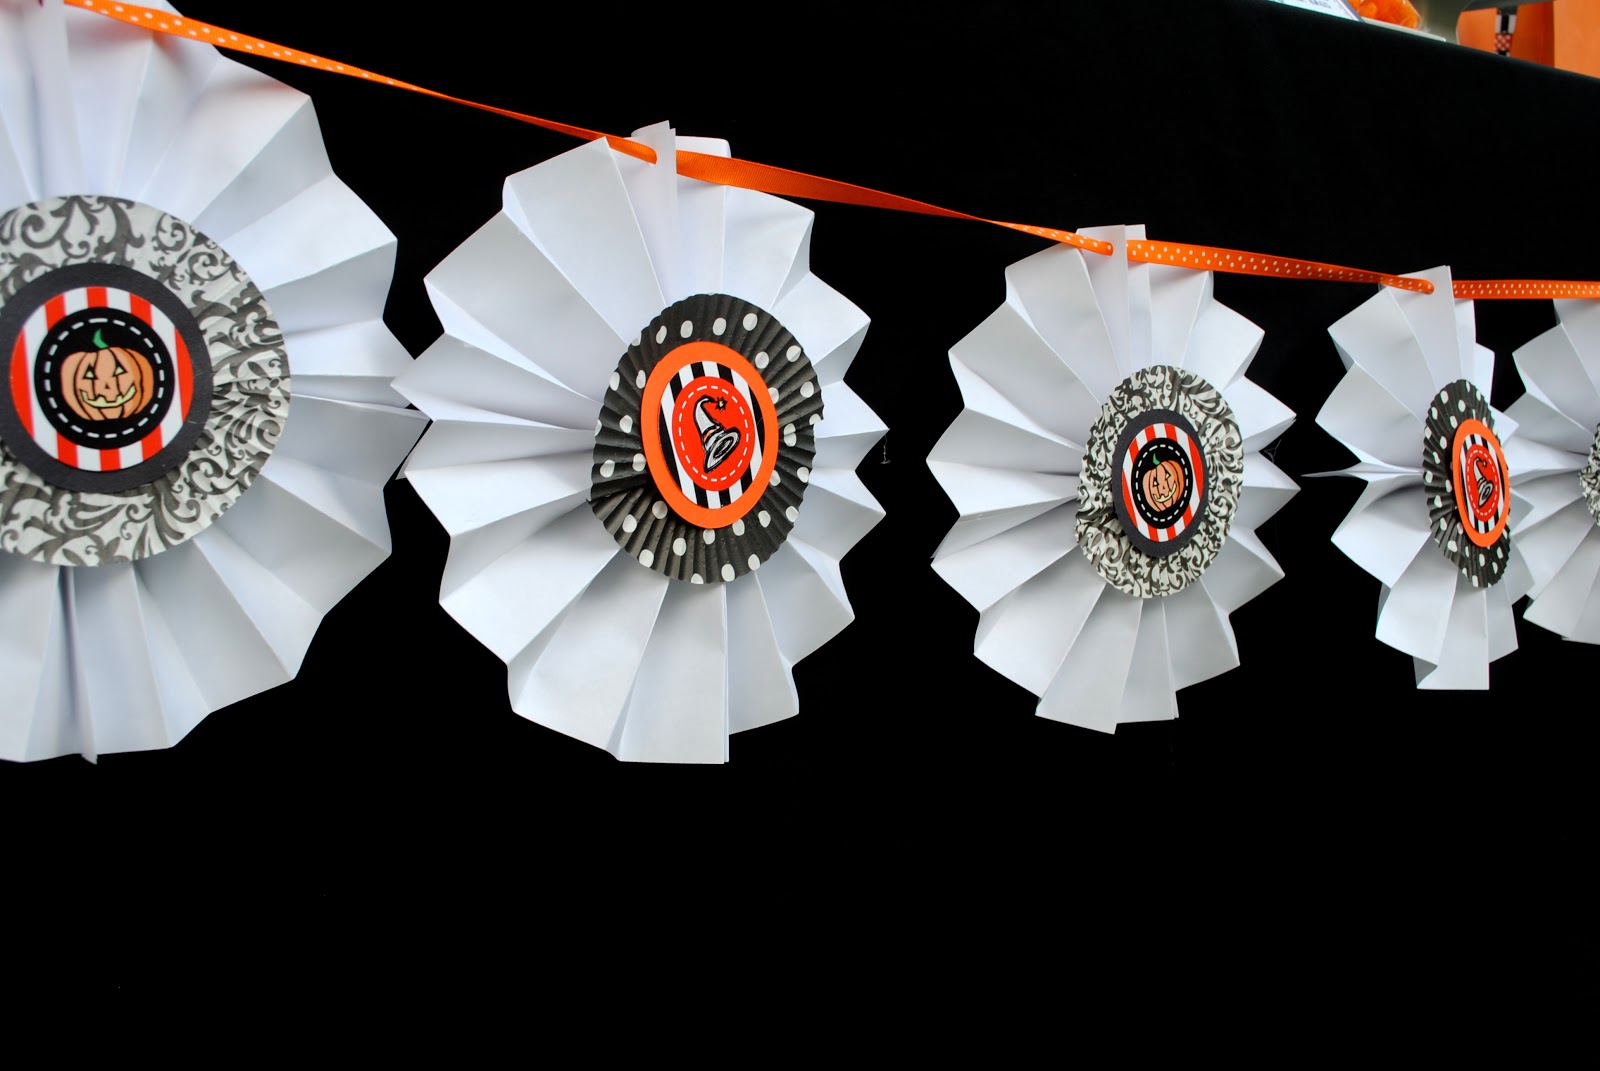
1. Start
by making the paper rosettes. Take one
sheet of 8 ½ x 11 paper and fold your paper back and forth, making accordion
folds.


2. Take folded paper and bend in half.

3. Repeat with another sheet of paper.

4. Glue together the inside edges of each piece.

5. You now have two pieces of paper that look
like fans. Glue the outside edges of
each fan together to make a circle. You
now have one paper rosette. Put aside.


6. Take a cupcake liner and put upside down and
flatten to make a flat circle.

7. To keep it laying flat, snip a small hole in
the center and make a fold so that the cupcake liner doesn’t pucker up.


8. Glue a 2½-Inch paper circle onto the center
of the flattened cupcake liner.

9. Glue a 2-Inch Paper circle on top of that. I used the 2-Inch party tags from my
Halloween Party Printable Collection you can purchase HERE, but you can use any paper that has an interesting Halloween
image or pattern.

10. Once the glue dries, take your “cupcake liner
centerpiece” and glue it onto the paper rosette you put aside.

11. Punch a hole in the top center of the paper
rosette where you will be stringing your ribbon through.

12. Repeat steps 1-11 until you have completed 7
paper rosettes with a Halloween-themed center.
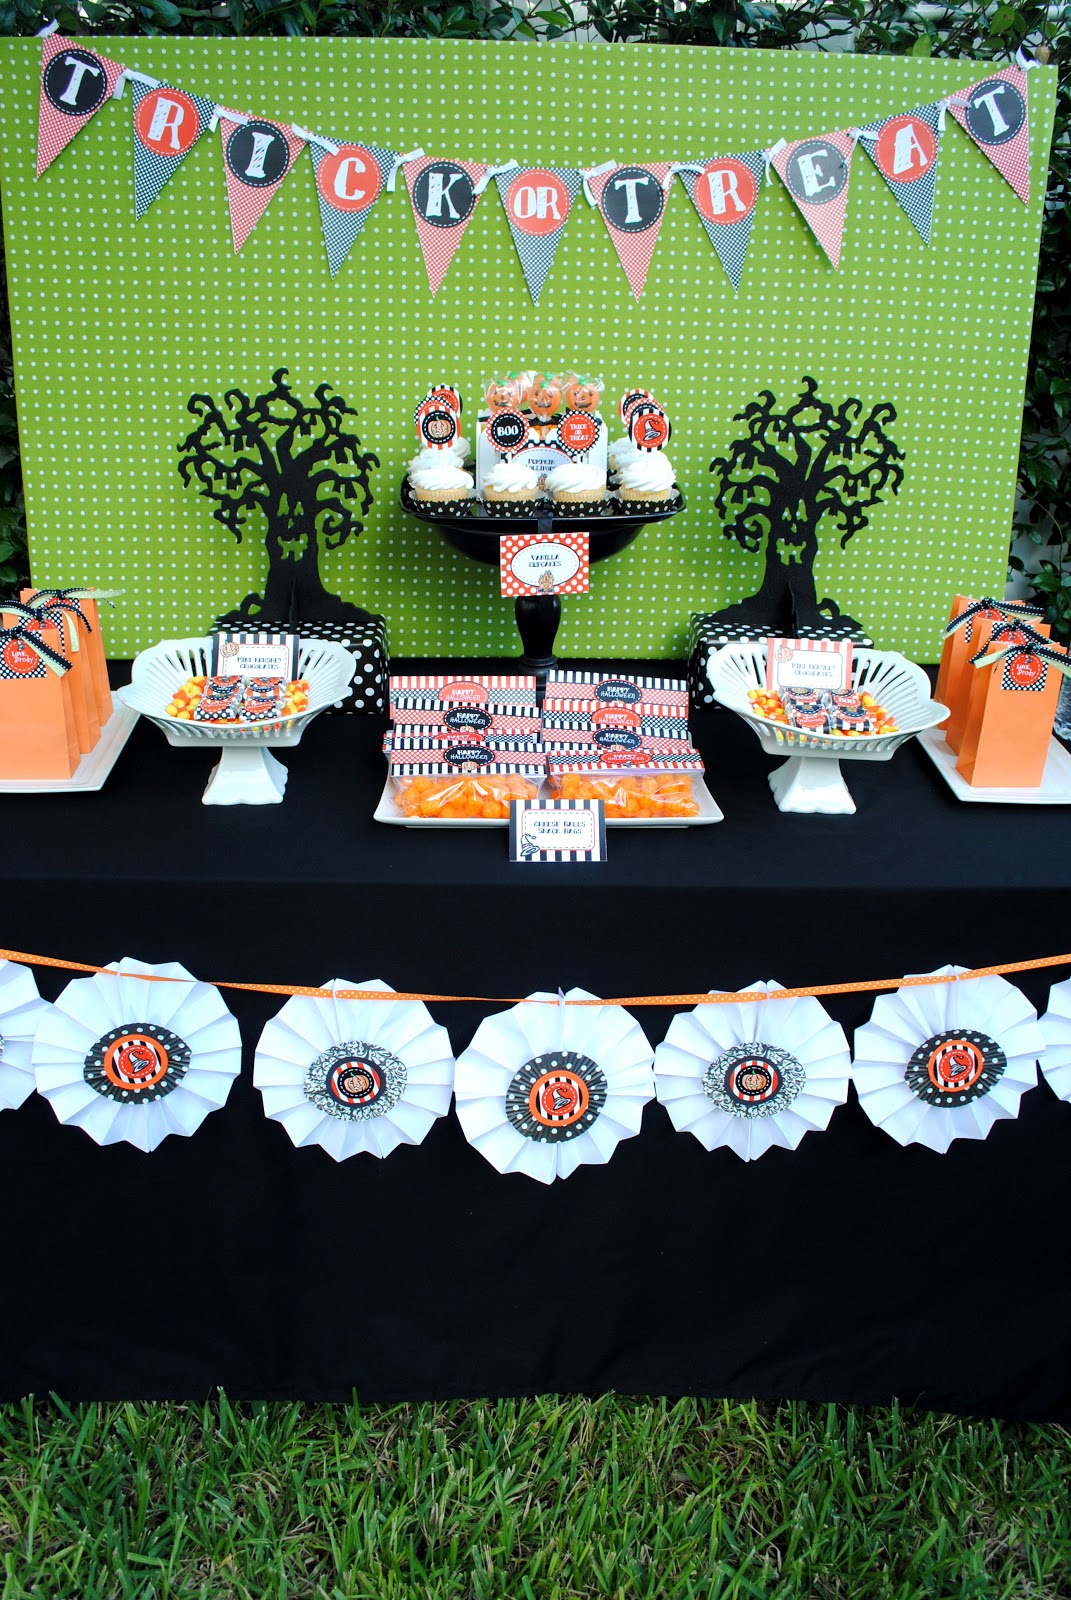
13. Take your ribbon and string through the 7
paper rosettes. I used 7 feet of this
ribbon since I was going to hang the banner on a 6-foot banquet table, so
measure the length according to where you will hang your banner.


This is really a simple and budget-friendly craft and makes for a great Halloween decoration! I hope you give it a try! Have fun creating! Check out the full Halloween Party tablescape HERE!
No comments:
Post a Comment