Thank you so much for taking the time to visit my blog! Please look around and see what my blog has to offer, from party inspiration, DIY craft tutorials, yummy treat ideas, and so much more! And make sure to pin on Pinterest! If you click on the Free Printables tab on the top of this page, you will find all of my posts with free printables. Also, if you would like to stay up-to-date with all of my new posts, subscribe by email (enter it on the right margin of this page) or like my Facebook page HERE. Have a blessed day!

Friday, September 23, 2011

Halloween Party Tablescape


Today is the first official day of fall so I thought it would be a great time to introduce my new Halloween Party Printable Collection!  I absolutely love Halloween.  I think it has something to do with seeing my kids dressed up in cute costumes and having lots of sweet treats nearby.

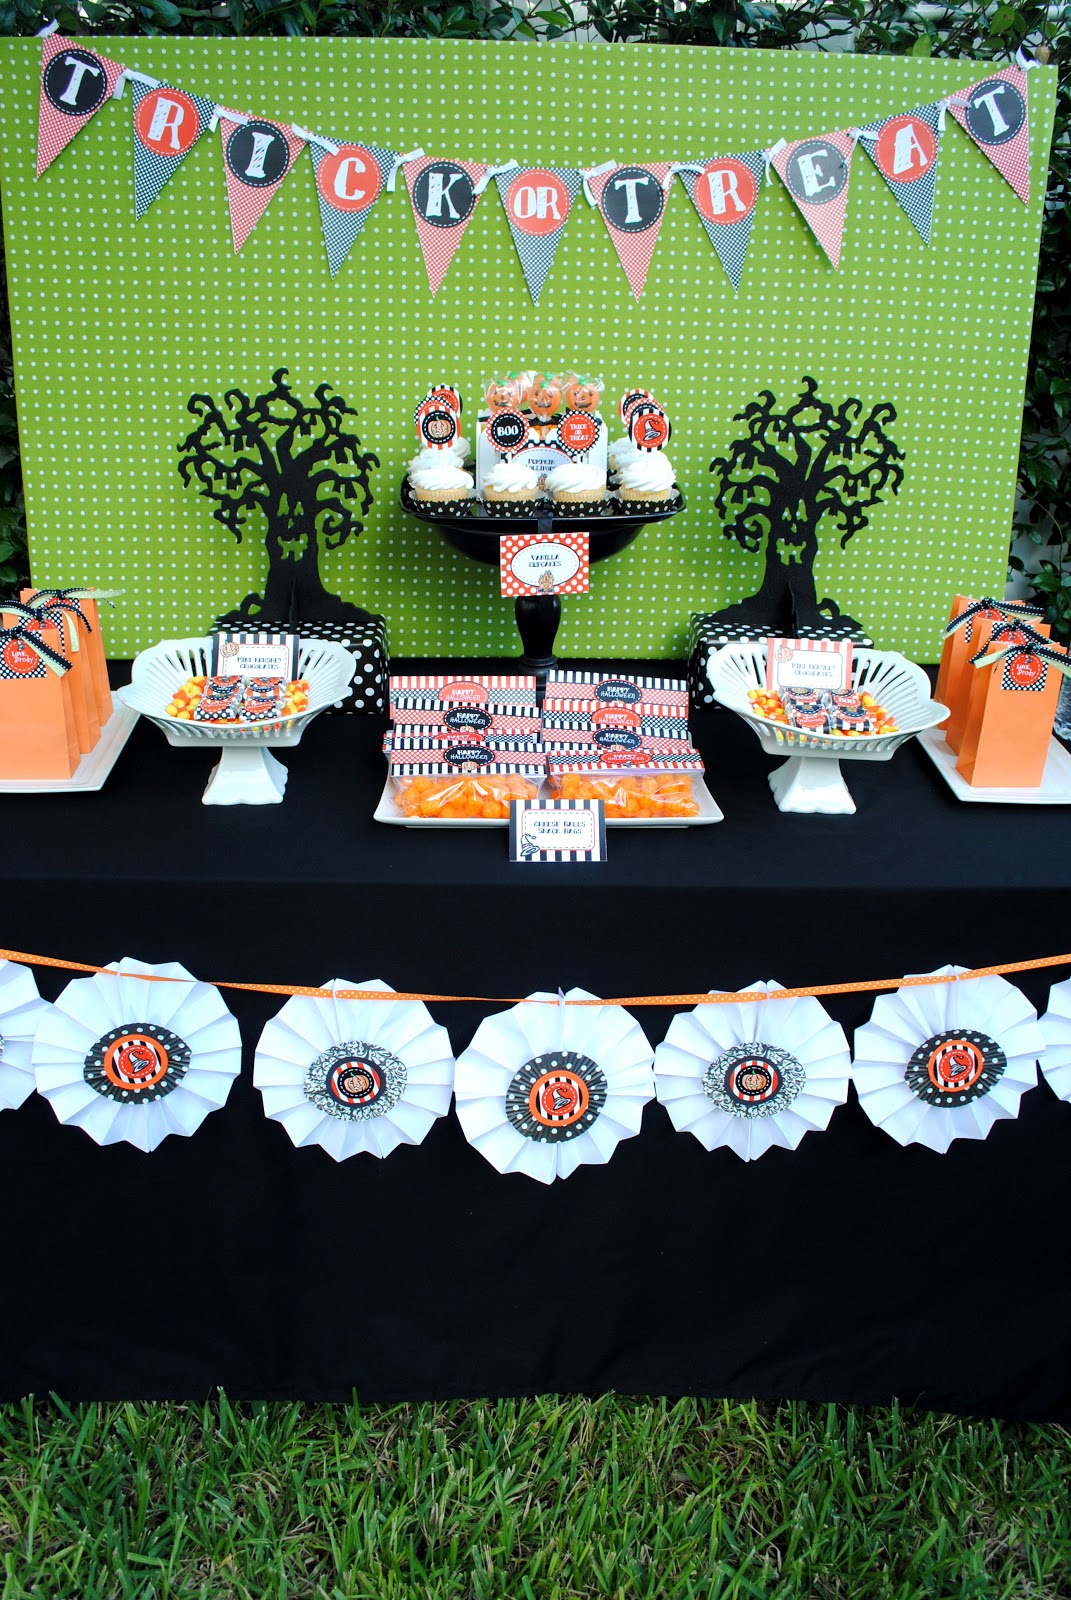
When designing this Halloween Party table using my new printables, I wanted to make it kid-friendly with drinks and snacks that can be grabbed easily by little hands.  And I also wanted to make it on a low budget.   Most of the items were purchased from Dollar Tree and Walmart.  My neighbors love hanging out in our culdesac, so I thought this table would be great for an outside block party and would also be perfect in the classroom!  The printable collection even comes with a page of personalized tags (perfect for giving goodie bags to classmates!)

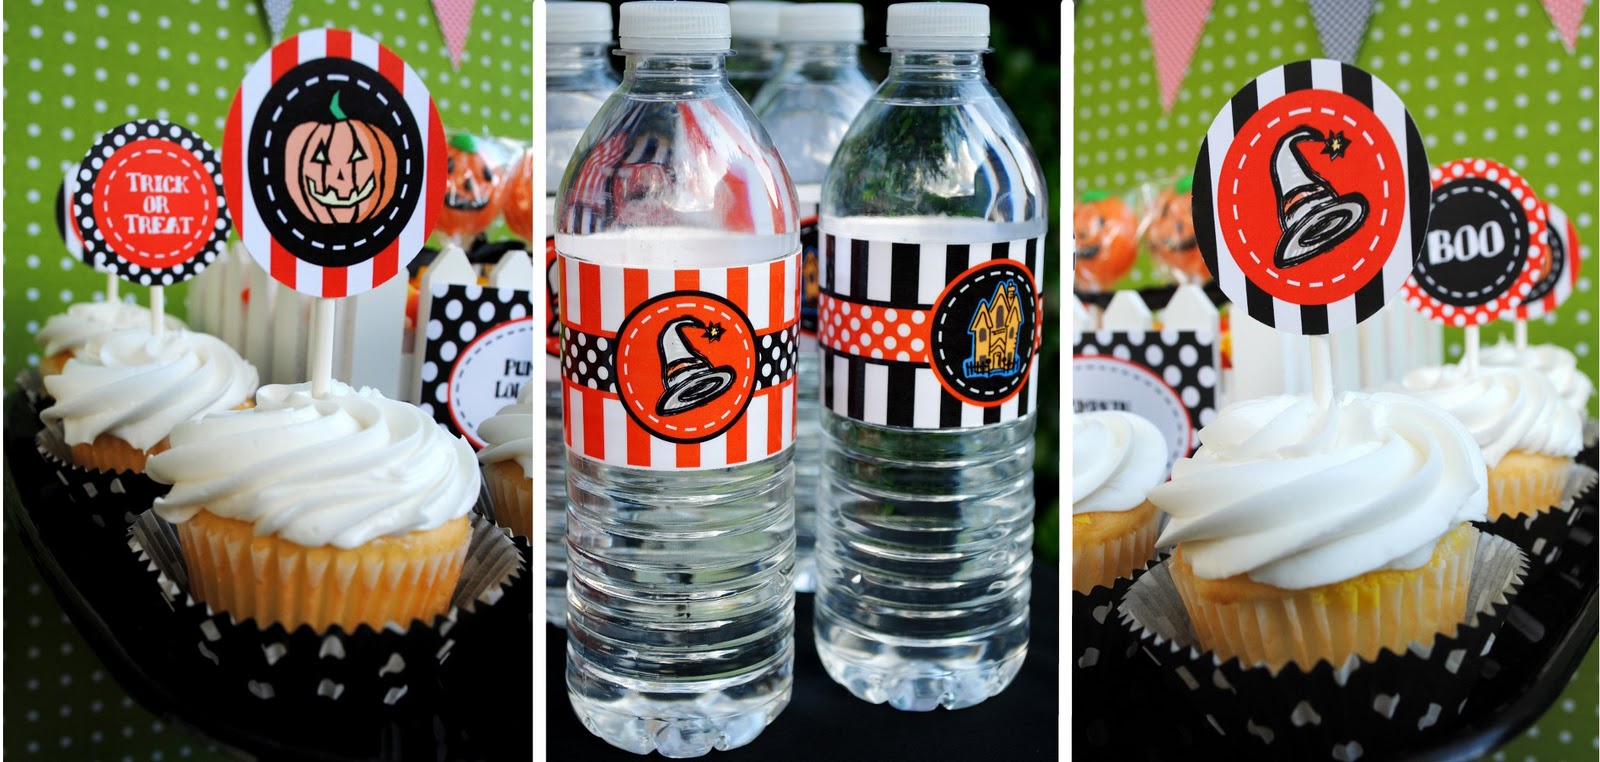
Check out some of the details:


These paper sacks purchased from Michaels are perfectly sized to to hand out goodies like a pouch of fruit snacks, stickers, and tattoos to friends and the personalized tags add a nice touch!


The mini Hershey candies are always a big hit when I serve them at a party.  They can easily be transformed to match the party theme using the coordinating labels and some double-sided tape!


These bright bag labels are not only great to hand out at your Halloween party, but they would be nice to put into your child's lunchbox since they are sized to fit a standard sandwich or snack bag.


I bought the spooky trees from Dollar Tree and I wrapped tissue boxes in black and white polka dot paper to add height.


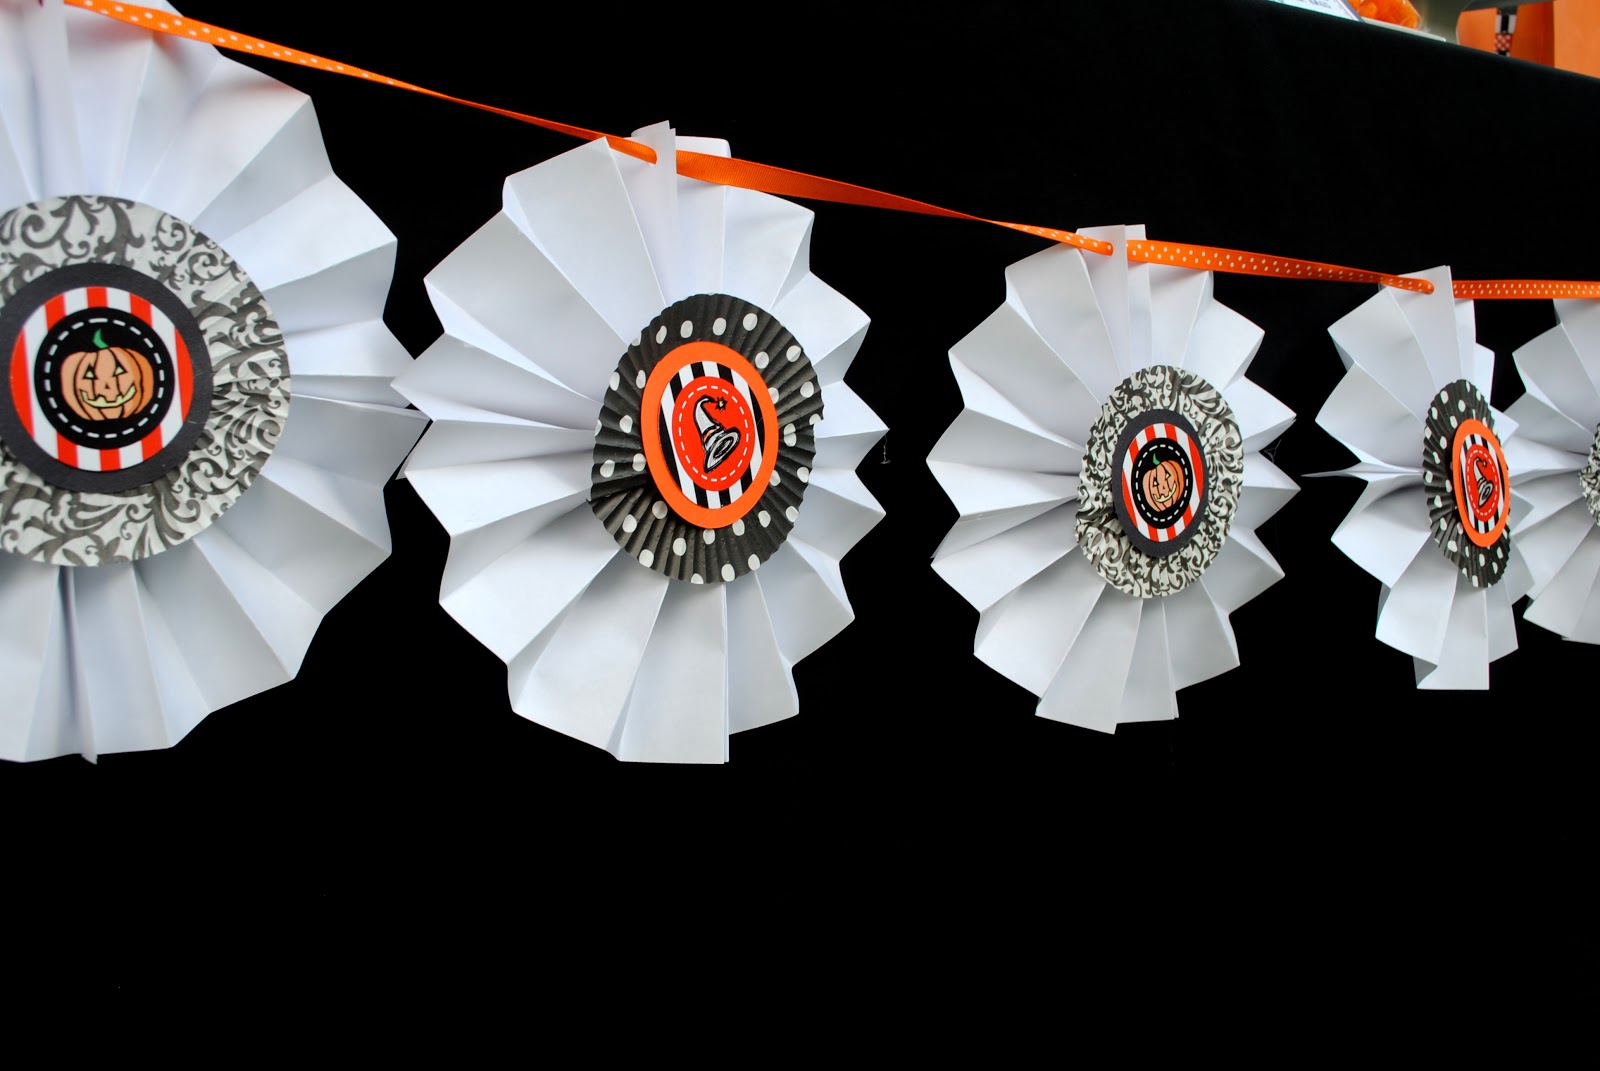
You can create this Halloween Rosette Paper Banner using my tutorial HERE.  The floor-length tablecloth is actually a very affordable black queen-sized bedsheet purchased from Walmart.


I had so much fun designing this table!  Thanks to my wonderful husband for being my partner and helping me once again on another project!

Vendor Credits:
Styling, Photography, and Party Printables: Sweet Metel Moments 
Cupcakes and various candies: Walmart
Spooky Tree Silhouettes and Pumpkin Lollipops: Dollar Tree
Orange Sack Bags: Michaels

Check out the Halloween Party printable collection in my Etsy Shop!  The full collection is on sale through the month of September for only $9.00!


Wednesday, September 14, 2011

DIY Tutorial – Paper Rosette Halloween Banner


I have seen lovely paper rosettes in several parties recently and knew that I wanted to incorporate them into one of my dessert tables.  Using supplies that I already had at home, I was able to create a fun and budget-friendly Halloween banner made from these paper rosettes.  Here’s how:

Supplies:
- (14) sheets white 8 ½ x 11 office paper (you can use scrapbook paper to add more color, but scrapbook paper can be expensive and I already had boxes of white office paper on hand)
- Glue Gun
- (7) Patterned Cupcake Liners - I used (3) black/white polkadot liners and (4) black/white damask liners
- (7) 2½-Inch Paper Circles - I used (3) orange circles and (4) black circles and my Martha Stewart Circle Cutter to cut circles out of scrapbook paper
- (7) 2-Inch Paper Circles - I used my 2-Inch Craft Punch to punch out the party tags from my new Halloween Party Printable Collection
- Hole Puncher
- Ribbon

Instructions:

1.   Start by making the paper rosettes.  Take one sheet of 8 ½ x 11 paper and fold your paper back and forth, making accordion folds.


2.  Take folded paper and bend in half.

 
3.  Repeat with another sheet of paper.

 
4.  Glue together the inside edges of each piece.


5.  You now have two pieces of paper that look like fans.  Glue the outside edges of each fan together to make a circle.  You now have one paper rosette.  Put aside.


6.  Take a cupcake liner and put upside down and flatten to make a flat circle.


7.  To keep it laying flat, snip a small hole in the center and make a fold so that the cupcake liner doesn’t pucker up.


8.  Glue a 2½-Inch paper circle onto the center of the flattened cupcake liner.


9.  Glue a 2-Inch Paper circle on top of that.  I used the 2-Inch party tags from my Halloween Party Printable Collection you can purchase HERE, but you can use any paper that has an interesting Halloween image or pattern.


10.  Once the glue dries, take your “cupcake liner centerpiece” and glue it onto the paper rosette you put aside.


11.  Punch a hole in the top center of the paper rosette where you will be stringing your ribbon through.


12.  Repeat steps 1-11 until you have completed 7 paper rosettes with a Halloween-themed center.

13.  Take your ribbon and string through the 7 paper rosettes.  I used 7 feet of this ribbon since I was going to hang the banner on a 6-foot banquet table, so measure the length according to where you will hang your banner.  


This is really a simple and budget-friendly craft and makes for a great Halloween decoration!  I hope you give it a try!  Have fun creating!  Check out the full Halloween Party tablescape HERE!


Thursday, September 8, 2011

Colorful Drinks to Brighten Your Day


Don't you love these cute, colorful drinks?  They are great for making your little ones smile after a long day at school, or they can brighten up a drink table at a birthday party.  

I got these small glasses from Ikea that are perfectly sized for little hands!  And I used Wilton colored sugar that you can find in most craft stores.  Just moisten the rim of the glasses with water, dip in colored sugar(s) of your choice, and VOILA!, you have sugar-rimmed glasses ready to fill with a beverage of your choice.  For my colorful drinks, I used pink colored sugar with raspberry lemonade, purple colored sugar with purple Gatorade, and yellow colored sugar with regular lemonade.


Brody and Skylar enjoyed every sip (and they liked eating the leftover sugar too!)  Enjoy!


Monday, September 5, 2011

Happy Labor Day!


Happy Labor Day!

Where did the summer go?  I hope you made some great summer memories.  Here are some of my favorite moments...