Since my kids have collected a large amount of crayons in the past few years (many that have broken), I have been wanting to make newly shaped crayons with them for a while now. We finally did it during summer break! I purchased a star-shaped silicone ice cube tray on clearance after 4th of July and I knew it would be perfect for this project.
Want to make your own crayons?
Here is what you need:
Old Crayons
Silicone Mold Tray (you can get some at Dollar Tree or Ikea)
Cookie Sheet with Aluminum Foil
Oven
Here are the steps:
Step 1:
You
can skip this step if you want to make the crayons multi-colored, but
we wanted single-colored crayons, so we separated the crayons into
different bowls by color.
Step 2:
This
was probably the most time-consuming part. You need to take off all of
the paper that is on the crayons. Some are stickier than others!
Step 3:
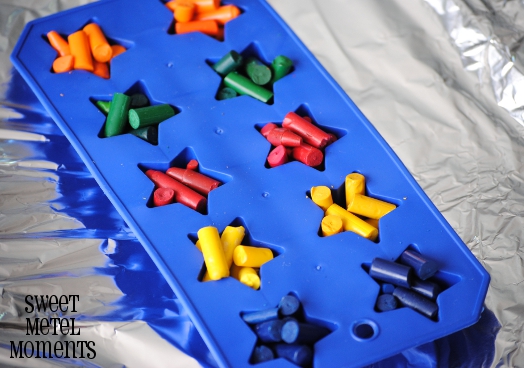
Break the crayons into small pieces and fill up the mold. Put the mold on a cookie sheet lined with aluminum foil (in case of any drips!) then place the mold and cookie sheet in a preheated 250 degree (F) oven for 5-10 minutes. You can peek from time to time to make sure nothing strange is happening in there!
Step 4:
As you are peeking, use a toothpick to gently poke at the
crayons to release some of the air pockets. Once the crayons are completely melted,
pull the cookie sheet and mold out of the oven and allow them to rest on the counter
until cooled. (I waited about an hour to be safe).
Step 5:
Sorry I didn't take a picture of this step -- Dip the bottom of the mold in a hot water bath, to help soften up
the silicone tray and help separate the crayons from the bottom of the
mold. Then push the mold from the bottom and pop out each crayon.
And now you should have newly shaped crayons!!
Have fun!
Tip: Although I will only be using this mold for non-food items, I still needed to clean it. It was pretty waxy and messy, so I used Goo Gone Spray to help with the cleanup! It was a great timesaver.


No comments:
Post a Comment